Showing posts with label costumes. Show all posts

Wednesday, February 10, 2016

Gandalf (Burda 2483) and „Indian“ Costume / Gandalf- und „Indianer“-Kostüm

(scroll down for English...)

Am Aschermittwoch ist alles vorbei... und ich stelle vor, was ich dieses Jahr für die kleinen E's genäht habe.

Gandalf


Mein Sohn ist handarbeitsmäßig schwer benachteiligt, seit er lieber anzieht, was die großen Bekleidungsketten so bieten (und ich mich weigere, genau das nachzunähen – dann lieber kaufen). Deshalb habe ich mich gefreut, als er sich ein genähtes Kostüm gewünscht hat, bzw. das gewünschte Kostüm in seiner Größe nicht zu kaufen war. (Achtung Marktlücke: Kinderkostüme gehen oft nur bis Gr. 146 oder so, für Erwachsenenkostüme ist er noch zu klein und vor allem zu schmal.)

(links: Gandalf, rechts: auch selbstgenäht, von meiner Mutter vor ca. 30 Jahren)

Ich habe diesen herrlichen, stoff-fressenden Schnitt (5 m!) entdeckt (Burda 2483) und ausnahmsweise nicht selbst konstruiert und zusammengetackert, wie ich es mit Kostümen gerne mache. Als ich seinen wehenden Saum von ferne sah, war ich sehr zufrieden über diese Entscheidung, der Schnitt gibt wirklich ein ganz tolles Gandalf-Kostüm her!

(getragen und nicht gebügelt. Gandalf bügelt nicht)

Da ich normalerweise nicht mit Einzelschnitten nähe, sondern aus Zeitschriften abpause (runterladen, drucken und kleben stelle ich mir auch nervig vor), hier mein Fazit: mehr Spaß als Abpausen macht das auch nicht. Interessant war auch, die Infos wie Maße oder Schnittplan auf den Bögen zusammenzusuchen!

(Ärmel)

Ich habe viel geändert, mein Sohn ist knapp 160 cm groß und hat 16 cm weniger Brustumfang als die kleinste Herrengröße. Ich habe alle Änderungen gleich am Schnitt gemacht und je 4 cm vorne und hinten an jeder Seite (also quasi in der Mitte der Teile) an Weite weggenommen, Halsausschnitt und Schultern angeglichen, Ärmel und -loch nach Augenmaß verschmälert. Für die Längenkürzung hatte der Schnitt Markierungen, das ist natürlich toll (und bei diesem Schnitt ein bisschen überflüssig... egal!). Die Passform ist super (und ich dachte nachher, hätte ich das nicht so genau an seine Schultern angepasst, hätte er es noch ein paar Jahre länger tragen können...)!

(von hinten)

Weil's so schön war, habe ich die sichtbaren Nahtzugaben durch Rechtslinksnähte (habe ich bei der deutschen Sewing Bee zum ersten Mal gehört, heißt das wirklich so?) und mit Schrägband versäubert. Als Material habe ich Baumwollleinen von Stoff & Stil, in „Stein“ glaube ich, genommen. Das war die perfekte Schlammfarbe, auch wenn Gandalf im Original einen etwas bläulicheren Ton trägt.

Beim Schnittmuster ist auch ein Hut dabei. Der Schnitt sieht normale Einlage vor, und dass man die Spitze evtl. mit Füllwatte ausstopft. Ich konnte mir nicht vorstellen, dass das genug Stand gibt und habe einen Rest Schabrackeneinlage genommen, den Hut komplett gefüttert, und die Einlage auf das Futter gebügelt. So konnte auch die Futterspitze, ohne die steife Einlage wenden zu müssen, einfach in den äußeren Filzkegel geschoben und alles mit der Krempe verstürzt werden. Hat super funktioniert!

(von hinten, nach dem Regen, mit Kamellesack)

Letzten Endes war das Kostüm nicht die reine Freude, es regnete beim Zug, und Schirm tragen und bücken nach Kamelle geht mit so einem Gerät auf dem Kopf leider schlecht. In der Schule gab es aber Bewunderung für meinen Gandalf, und mir hat das Kostümenähen Spaß gemacht!

Die „Indianerin“


Ich setze das mal in Anführungszeichen, weil es natürlich „amerikanische Ureinwohner“ heißt, was dieses Kostüm aber gar nicht darstellen soll, sondern ein ganz klischeemäßiges „Indianerspiel-Kostüm“. Genäht hatte ich es auch nicht für Karneval, sondern schon für unsere Ballettaufführung im Dezember, die unter dem Motto „Peter Pan“ stand, und in der Geschichte kommen eben auch (so genannte) „Indianer“ vor.


Ich hatte mir ein paar Zeichnungen gemacht, wie das Kostüm sein sollte – länger als ein Oberteil, aber so, dass man beim Tanz nicht darauf kniet (der gezackte Saum war die Lösung), und ohne viele Verschlüsse für den schnellen Kostümwechsel. Weil der offene Ausschnitt störte, habe ich ein kleines Häkchen angenäht.


Die Verzierungen habe ich pi mal Daumen verteilt, klar war nur, dass ich einen Latz oder Plastron in dem schönen gemusterten Stoff haben wollte. Dafür habe ich das Rechteck vorne aufgenäht, unten mit einer Borte versäubert, und dann Oberstoff und Zierstoff zusammen rund um den Ausschnitt und Schlitz mit einem selbst gebastelten Beleg verstürzt.

(für den Mann gab's auch noch 'ne Tunika - frei zusammengeschustert)


Als Grundschnitt habe ich eine Tunika aus der Ottobre genommen. Stoffe und Zubehör sind alle von buttinette.

Habt Ihr Karneval gut überstanden? Schon mal zwei Tage am Stück Kostüm(e) genäht?

Ich wünsche Euch einen schönen Mittwoch!

Mehr über Karneval findet Ihr hier und hier, alle Kostüme-Posts hier.

*******************************************************

I made two costumes (phew)! For German carnival. Curious what that means? Look here and here!)

(my mom made the costume on the right about 30 years ago)

One, a Gandalf coat and hat from the pattern Burda 2483. The effect is very much like the real Gandalf coat, so kudos to Burda for this pattern!

(Worn and unpressed. Gandalf does not press his clothes.)

I had to wrangle 5 yrds of fabric, and make a men's pattern into a boy size (about four inches shorter and 8 inches less wide/smaller than the smallest men's size). 


I also constructed the hat differently, using a very heavy interfacing and fully lining the hat so I could attach the interfacing to the lining and the shove it into the tip of the hat. Success!

(rain-soaked, and with a big bag of candy)


DD danced in her ballet school's recital of „Peter Pan“, and amongst others she was an „Indian“. Quotation marks, because while there are no (native) Indians in America, just Native Americans, that's what they're called in Peter Pan, and in carnival it's such a stylized costume that I'm not sure it has anything to do with the real Native American clothes!


The costume had to be long enough to go with tights and short enough so she wouldn't kneel on it. Also, no or few fastenings for fast costume changes (I added a hook and eye in the end). 


I sketched out the placement of the trimmings and added the bib piece by attaching a fabric rectangle to the front fabric, drafting a facing and sewing main fabric and bib as one to the facing. That also cleanly finished the front opening. I used an Ottobre tunic pattern as a base pattern for the costume.

(umm, yeah, hubby also got a speedily thrown together tunic!)

We had a blast watching the carnival parades and collecting candy and flowers (though DS had to hold on to his hat a lot :-) !). Happy sewing!

For all my past costume posts see here.


Tuesday, January 15, 2013

What We're Working On / Unser aktuelles Projekt

It's that time of the year again - carnival, Mardi Gras, what have you - costume sewing!

You know I love to do this, and this year DS (9 yo) is determined to be a part of the process.

I usually make up costumes without a pattern, and I start with a sketch (previous costume sketches here and here). So, when DS said he wants to be (Saint-Exupéry's) Little Prince, I asked him to sketch the costume. Here it is:


I've been working on the coat and DS has been crafting boot shafts from black felt. Stay tuned for more!

***************************

Das Kostümenähen für Karneval hat inzwischen einen festen Platz in unserem Jahresrhythmus. Dieses Jahr will mein Sohn (9 Jahre alt) als (Saint-Exupérys) Kleiner Prinz gehen, und er möchte mithelfen.

Ich nähe Kostüme in aller Regel ohne Schnitt und fange mit einer Zeichnung an (in den letzten Jahren z.B. hier und hier). Da ich keine Ahnung habe, was ein Kleiner Prinz so trägt, hat mein Sohn die Zeichnung gemacht.


Ich bin schon fleißig beim Mantel, er hat einen Stiefelstulpen aus schwarzem Filz fertig.

Fortsetzung folgt!


Sunday, February 26, 2012

"Moritz" Costume / "Moritz"-Kostüm

It's me, again. The "Kamelle" are sorted (and half eaten) and DS has finished his costume wearing for this carnival season. Here it/he is:


He's personifying Moritz, a character from the story "Max and Moritz" by Wilhelm Busch, a (rather macabre) children's classic from 150 years ago. When wearing the costume he tried to stay in character, not necessarily murdering any hens (or worse), but sticking out his tongue a lot!

Construction details - is anyone really interested in these? Since I drafted/fudged a lot of this project, I'm going to include a bit of detail. Feel free to skip this part!

I had a look at the drawings which don't show much detail regarding the clothes. Moritz is wearing a tunic with a buttoned yoke and a billowy bottom part, and a pair of sometimes checked pants. The story is in black and white; some pictures can also be found colored in for a book cover or such; from these I took the top to be green and the pants red.

I drafted the tunic myself! And I'm quite happy with the result. The inside-out facings are a bit irregular, but that's what you get for cutting right into the fabric without making a pattern first! DS had got it into his head that the tunic should have leather lacings (not authentic), and I had a package of rivets I hadn't dared to use on a "serious" project, so I happily got out the big hammer and went to work. It worked quite nicely, so I may add rivets to my sewing arsenal now!

Here's how I drafted the tunic: I took a longsleeve t-shirt for measurements and used these to draft a one-piece yoke with cut-on kimono sleeves. The yoke was slashed in front and a facing cut and sewn on top of (not inside) the tunic. The outer edges of the facings were sewn together with interfacing and turned before applying the facings. I then stitched down the facings (and later the sleeve and bottom hems) with thick brown embroidery thread for a rustic/handmade look.

The bottom part of the tunic was drafted by adding a few inches in width to the yoke measurements for four small pleats , and a few inches in length (compared to the tee) to cover DS's bottom.

The pants are a very slapdash copy of a pair of DS's sweatpants; elastic waist, unelastic bound legs. (I like this finish for pants that are a bit too long but I don't want to cut down; the slightly tighter binding ensures the child doesn't step on them.).

I couldn't find a checked red fabric and went with solid red, thinking I could maybe sew on some black checkered lines. DS couldn't decide before sewing whether he really wanted checks, so in the end I had to draw them at the last minute in waterproof marker on the finished pants. Stunt sewing at its best!


I also made a rooster he could clip onto his pants to show what he's been up to. I drew a (hanging) rooster according to an image from the story onto two layers of base fabric, sandwiching a layer of fleece. I zigzagged around the outer shape and appliqued contrast colored fabric scraps on top to make up the rooster. Last, I cut out the finished bird. I also added a ribbon loop to the bird and a hook to the waistband of the pants.


I haven't had this much fun sewing in a long time. Maybe costumes is the way to go?!

******************

Auf das Ratespiel hat sich keiner eingelassen, aber am Hahn habt Ihr bestimmt erkannt, dass es einer von "Max und Moritz" sein sollte, oder? Die Kleidung ist in den Zeichnungen eher angedeutet, zu erkennen ist aber, dass Moritz eine grüne Tunika mit Schlitz und Knopf, Quernaht unter der Brust und blusiger Weite trägt sowie eine rote Hose mit schwarzen Karos.


Die Tunika habe ich anhand eines langärmeligen T-Shirts konstruiert; zunächst die Passe mit angeschnittenen Ärmeln, einem außen aufgenähten Beleg und - nicht original, aber Junior wollte es so - Ösen für eine Schnürung mit Lederband. Letztere hatte ich schon länger hier, habe mich aber nie getraut sie einzusetzen aus Sorge, ein schönes Stück zu ruinieren. Wie gut, dass es angstfreies Kostümnähen gibt! Beherzt den Stößel geschwungen, und... es hat geklappt, uff!

An die Passe habe ich ein weiteres, längeres Stück angesetzt, vier kleine Falten eingelegt, und die Säume sowie den Beleg mit dickem Stickgarn und groben Vorstichen genäht, für den handgemachten/rustikalen Look.

Den Hahn habe ich aus zwei Lagen Satin und einer Zwischenlage Vlies gemacht. Auf den weißen Satin habe ich mit Edding Konturen und ein paar Details aufgemalt, rundum mit Zickzack umrandet und darauf farbigen Satin für Kamm, Schnabel usw. appliziert. Zum Schluss alles ausgeschnitten, ein Band hatte ich zwischengefasst und einen kleinen Karabiner an die Hose genäht, damit der Schlingel seine Beute immer dabei haben konnte!


Die Hose ist eine grobe Kopie einer vorhandenen Jogginghose, mit Gummizug und (festen) Bündchen an den Beinen. Karierter Satin war nicht zu haben und mein Sohn konnte sich nicht entscheiden, ob er auf Karos bestand, bis die Hose schon fertig war, so dass ich letzten Endes die Karos mit Edding aufgemalt habe.

So viel Spaß habe ich beim Nähen lange nicht gehabt; vielleicht sollte ich mich auf Kostüme verlegen...

Saturday, February 4, 2012

Fairy Costume/Feenkostüm

Yes, I will get back to FEA. Soon-ish :)
*********
Es wird auch bald wieder um's Stoffverzieren gehen. Versprochen!


(front/vorne)

I finished sewing both childrens' costumes, today I'm showing the girl's costume - FlowerButterflyWhateverFairy. Really, she only cares about pretty colors and glitter. We may reuse a pair of wings we have. I don't know whether I'll get around to making the hair piece I sketched or not.

**************

Ich habe inzwischen beide Kinderkostüme fertig, bis auf ein paar Details wie Flügel, die aus dem Fundus ergänzt werden können. Was genau Töchterlein darstellen soll weiß ich selber nicht, Hauptsache (wenigstens zum Teil) pink und glitzernd. Vielleicht mache ich noch den Haarschmuck aus meinem Entwurf, mal sehen.


(back/hinten)

I appliqued flowers and leaves and butterflies. I didn't bother with stitching them on, I just ironed some double-sided interfacing on to fabric scraps, cut out the shapes freehand, ironed them on and sewed a few seams right through, marking the leaves' "veins" etc. I don't think this will get washed a lot so I hope that's enough! I sewed the twigs freehand with a small zig zag. For stability, I did a mixture of lining and underlining the bodice. I sewed the neck and back seams as if lining the bodice, then appliqued, and afterwards treated the bodice/lining pieces as one, so the arm and waist seams aren't hidden. Worked for me though!


Hier eine Detailansicht der Applikationen. Ich habe alles freihand aus mit Klebevlies bebügeltem Stoff ausgeschnitten und aufgebügelt. Rundum festgenäht habe ich nicht, nur ein paar Nähte quer durch laufen lassen. Da ich nicht davon ausgehe, das Kostüm ständig waschen zu müssen, hoffe ich, es genügt. Die Zweige habe ich freihand aus dichtem Zickzack aufgenäht. Der Stabilität wegen habe ich vorher das Oberteil gefüttert/unterfüttert (den Halsausschnitt habe ich wie beim Füttern verstürzt, und nach dem Applizieren die Teile zusammen weiterverarbeitet. Sieht von innen nicht so schick aus, hat aber funktioniert!).

The sleeves have two layers: first, the pink sleeve which is unlined (and not hemmed in the photos, sorry!), on top of that the green sleeve which is lined and gathered.
The skirt has three layers; the bottom is green and lined, then there's a layer of yellow organza which is slightly gatheres, and on top are pink "petals" lined in turquoise.


Die Ärmel sind doppelt (und hier noch nicht gesäumt, sorry): der pinke Ärmel ist ungefüttert, darübert der gezackte, angekräuselte, gefütterte "Feenärmel".
Der Rock besteht aus drei Schichten:
Zuunterst grüner Satin mit Zackensaum, gefüttert; mittig gelber Organza, leicht angekräuselt/in Falten gelegt, und zuoberst pinke "Blütenblätter", türkis gefüttert.

There's nothing symmetrical about this costume; I only used a pattern for the bidice and under sleeves; other than that I just cut into the fabric using the width available and sewed together.
**********************
Symmetrisch ist an dem Teil übrigens nichts, einen Schnitt habe ich bis auf das Oberteil/innere Ärmel auch nicht verwendet, sondern alles so ausgeschnitten wie's kam und der Stoff gereicht hat.

What I love about sewing costumes (other than the pretty colors)? I can try out ideas and techniques without any fear of ruining a "proper" garment. Case in point: a hand-picked zipper with pearls (picking up  asmall pearl with every second pickstitch), and a lapped zipper with a lapped seam right through to the bottom of the bodice (which is why the pickstitched seam turns a little corner there). By the book? Not at all. But it worked!


Mein Liebstes am Kostümenähen ist neben der möglichen Spontaneität (und den bunten Farben), dass man ungestraft alle möglichen Techniken ausprobieren kann. Hier zum Beispiel mal den handgenähten Reißverschluss, wobei mit jedem zweiten Stich eine Perle aufgenommen wurde. Schick, oder? Die Naht ist so zackig, weil ich den verdeckten Reißverschluss so eingearbeitet habe, dass die Rückenteile überlappend zusammen bzw. aufeinander genäht wurden. Hat funktioniert!


The inside view is, umm, interesting! There's a reason I'm showing this though, another little fabric story: The different linings are all from the stash of a lady who lived in our house; she was born around 1900. My mom inherited bits and pieces from her household, among them lining pieces "too nice to throw away", but big enough for half a skirt at most. Now I've done my part in avoiding waste and used up these pieces that are 40 years old, maybe more! As an aside: Said lady had a traditional trousseau that lasted her whole life. The pieces were all monogrammed; I inherited some crib sheets and also these linen dish towels I still use today (some 90 years old I guess).

Die Innenansicht ist wirklich abenteuerlich, ich zeige sie aber vor allem, um Euch das schöne Sammelsurium an Futterstoffen vorzuführen, das ich verarbeitet habe. Hintergrund: Hier im Haus wohnte mal eine alte Dame, Jahrgang ca. 1900, die meiner Mutter alle möglichen Haushaltsgegenstände, so auch Stoffreste hinterlassen hat. Vor allem Futterreste, die jeweils noch für 1/2 Rock reichen würden. Ich habe jetzt meinen Teil zur Müllvermeidung getan und ca. 40 Jahre nach ihrer Entstehung drei Reste aufgebraucht! Hier noch ein schönes Detail aus dieser Geschichte: Die alte Dame hatte eine Aussteuer, die ihr Leben lang (und darüber hinaus) ausgereicht hat, und die seinerzeit ganz traditionell mit ihrem Monogramm bestickt wurde. Ein paar solche Küchentücher, geschätzte 90 Jahre alt, sind jetzt bei mir in Gebrauch.


I'm leaving you with this sneak preview of DS's costume. German readers may guess what/who he'll be.


Vorschau: So geht es weiter mit Kostüm Nr. 2. Na, wer errät, was mein Sohn wird?

Saturday, January 21, 2012

Carnival Distraction / Schon wieder: Karneval

In what little time I have to think about sewing/embellishing, I'm getting awfully distracted by the fact that it's four weeks until Carnival. And I have two costumes to sew.

I went fabric shopping today. This is my preliminary sketch for costume no. 1 (flower fairy):


Happy sewing!

****************************************************

Ich komme zu nichts (Nähen/GSV), lasse mich aber dabei noch ablenken durch den - hier im Rheinland - unvermeidlichen Karneval, für den zwei Kostüme zu fertigen sind.

Heute war ich Stoff kaufen. Hier schon mal Entwurf Nr. 1 (Blumenelfe):


Näht schön!

Thursday, February 18, 2010

Costume sewing (what else?)

Hello, I'm back.

I still have to get my bearings. Not sure how long that'll take. Two weeks of single mommy duty, topped with one (the last) day of Cologne carnival. Oof.

I did sew a bit.
One skirt, not sure it'll go with the SWALP, and it still needs hemming, so I'll show you later.

One costume (what else?). On Weiberfastnacht, I cranked up the carnival music, made a pattern out of DS's snow overall, and tacked together this Pooh bear costume. Front, side/back, and one happy bear after collecting all the carnival candy.

Alaaf!

Thursday, December 31, 2009

Holiday Sewing and a Happy New Year!

Hello everybody!

The holidays are behind us, but the decorations are still up, and I am only slowly coming to... Although I have been sewing (more than I thought, now I'm counting), the sewing machine has been mostly off the dining room table for quite some time now, and I am ready for sanity (sewing time!) to return.

Everything on my holiday sewing list has been checked off, thanks to my cousin who was our houseguest at Christmas and babysat the children a lot, and due to my letting the jacket take a back seat (the shell is finished; I "just" need to install buttonholes and lining).

First on my list was another Ottobre girls' tunic ( for the others, see here) for my best friend's daughter. My, I love that pattern! I tried to sew under cover, because I knew what would (and did) happen if DD saw the pink-and-red-rose fabric: she'd want one for herself.

Then, what better time to decide DS could use a new holiday outfit than December 22nd? The waistcoat and pants were finished on the 23rd, I'm proud to report.
And DS was really happy; no forcing dressing up on him, oh no. He grabbed his shirt, his bow tie, and the new clothes, and dressed up like a gentleman!

A few details: Both garments are made from a very fine corduroy, almost like velvet. The pants are fully lined in red-and-white gingham cotton, and the waistcoat in a dark blue poly lining (for the back, I also used the lining fabric.). For the pants, I used the Ottobre Pirate Jeans pattern I made these 3/4 summer jeans from. I cut on the back yoke and the waistband, essentially reducing four pattern parts to two parts. I used the back pocket pattern, but self-drafted (read: haphazardly cut out) a pocket with flap and velcro closing for the front. The waistcoat is an Ottobre pattern (6/2007 no. 20) as well. To save time, I left off the facings and fully lined it to the edges. I also just sewed on a strip of fabric in the back, instead of the traditional fastening with two fabric strips and D-rings. To finish it off, I used three maritime iron-on patches (boats and lighthouse). Fast and easy!

Third on my list was last year's Christmas dress UFO. I took a good long look at it, decided it could use a new zipper installation but I had nowhere near the time for it, so I finished the half-installed zipper, hemmed the lining, cleaned up the seams allowances, and - voila!?
Then I tried it on and found it a bit too wide, but didn't remember that at all... This was probably why I didn't finish it last year; I've gained a bit since then so the dress is alright now, but it would have been too loose last year. Funny, the things one remembers (or not). The pattern, which I omitted last time, is BWOF 11/2007 no. 107.

After the festitivities, there was another one - DD turned four! This couldn't pass without something homesewn, so I cranked out a tutu without a pattern. I'm not in love with it and I don't have a photo, but DD wears it, so that's that. I will say this much for children's costume sewing: The most worn garments (by far) I made last year are the witch and the angel costume. The children have a dressing-up box and take these out every couple of days.
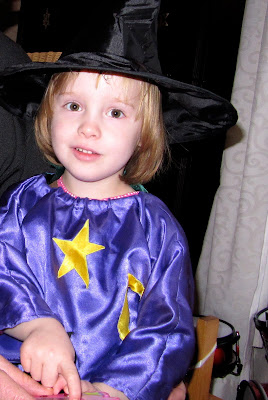
We had a Christmas witch and a tree decorating angel this year:

Tonight is New Year's eve, and then we'll be done with parties for a while. I'm really itching to get back to normal now. Karen said it best, and I hope she doesn't mind me quoting her: I really, really like to stay home and make things!

I think I'll pass the sewing recap, but it was a very productive year for me, and blogging and your lovely comments made it so enjoyable. I wish all sewers and all readers a happy, healthy New Year with lots of sewing time!

Tuesday, November 24, 2009

Abracadabra!

Well, I was about to lament the fact that I haven't sewn a stitch. Due to DS's sixth birthday - preparations and parties galore!

Then it came to me: I have sewn. For DS's birthday! He's really into magic tricks, so I made him a magician's cape. Sewn with maximum slapdash efficiency. No pressing, no re-sewing, no prisoners. Here it is:


DS put it on over his jammies right away!


Tuesday, February 24, 2009

Second, the angel

I have a few issues with blogger. How come if I start writing a post on Sunday, finish it on Wednesday and hit "publish" on Thursday, it shows Sunday's date? Also, why won't my pictures show up where I want them? Then again, I'm rather computer illiterate, so things can only get better.

Tomorrow's Ash Wednesday, so I'd better finish my costume reviews. The angel was also self-drafted, roughly along the lines of the witch costume, only bigger for my DS. I had intended to have some folds underneath the blue neck band/facing for a slightly billowy effect, and I thought I'd drafted it accordingly, but when I sewed the blue band/facing to the front, the lengths fit exactly without any ease. Oh well. I like how it turned out, so it's all right. When we went to Thursday's parade, DS rode his bike, wings flying behind him, which was a really nice effect!

A little note on the wings which turned out quite well - stiff enough to stand out, supple enough not to break or crease. I used the fashion fabric for front and back (all polyester satin), interfaced the outwards part with fleece fabric and quilted in some "feathers", and interfaced the inwards part with a very stiff interfacing meant for bags (incidentally, not stiff enough for bags really, but great for wings). Then I sewed it all together with a tight zig-zag-stitch (no serger here, regrettably) and hand-stitched it to the back of the costume.


The kindergarten party was a great success!

Monday, February 16, 2009

Creatures of the night

Hello again! I'm back from our vacation. As good intentions go... I have managed to sew some, put my feet up some more (after chasing the children around all day, of course!), but have not completely finished the childrens' costumes - the witch needs some elastic and hemming, and the angel needs wings. (I have tried to persuade my son that angels don't necessarily have wings, to no avail, of course.) There is also a deadline; this Thursday will be "Weiberfastnacht" which is one of the high days of German carnival, and the whole kindergarten will be in costume.

But... as I promised I'd be back after my vacation, I didn't want to leave this spot unattended until I finish the costumes, and will give a little retrospective on my son's vampire cape and a preview on the witch. (Gotta love it when a three-year-old goes all dangerous and "witchy"!)

First, the cape (and the ds):

It looks a bit limp here, but it has nice, bat-like spikes all around. I searched high and low for inspiration - what to make (to wear) for a vampire party? For a 5yo? A cape, but with what? All right, try free association... Death? hmmm... Graves? Headstones? Coffins? Maybe not... Blood? Not too much... In the end all that remained was the bat motive, and I hope it doesn't come off as too Batman-like!
I drafted this freehand, as I am wont to do whenever possible - childrens' costumes are a good opportunity for this. It's basically a half circle - or more like a half oval, the measurements derived from ds's spread out arm-span and shoulder-to-knee-length. I used black and red polyester satin, and Vliesofix - an iron-on-interfacing - for applying the bat. I drew the bat freehand as well, and I'm sure not very correctly! I used a fairly long velcro strip on the neck for extra party-fastness, and afterwards discovered this makes the cape truly one-size-fits-all; when I have a dark moment, I can wear it as a capelet, and it fits quite well!

This may well have been my last back project review for a while.
I'm a bit scared - now I'll have to start sewing faster I guess! So here are at least two teaser pictures from the next project - my material collection and inspiration drawings for the witch costume.
Live pictures to follow! Happy sewing!

LinkWithin

Blog Widget by LinkWithin