Showing posts with label refashion. Show all posts

Friday, March 14, 2014

Souvenir T-Shirt Refashion

(Heute gibt's Deutsch weiter unten...)

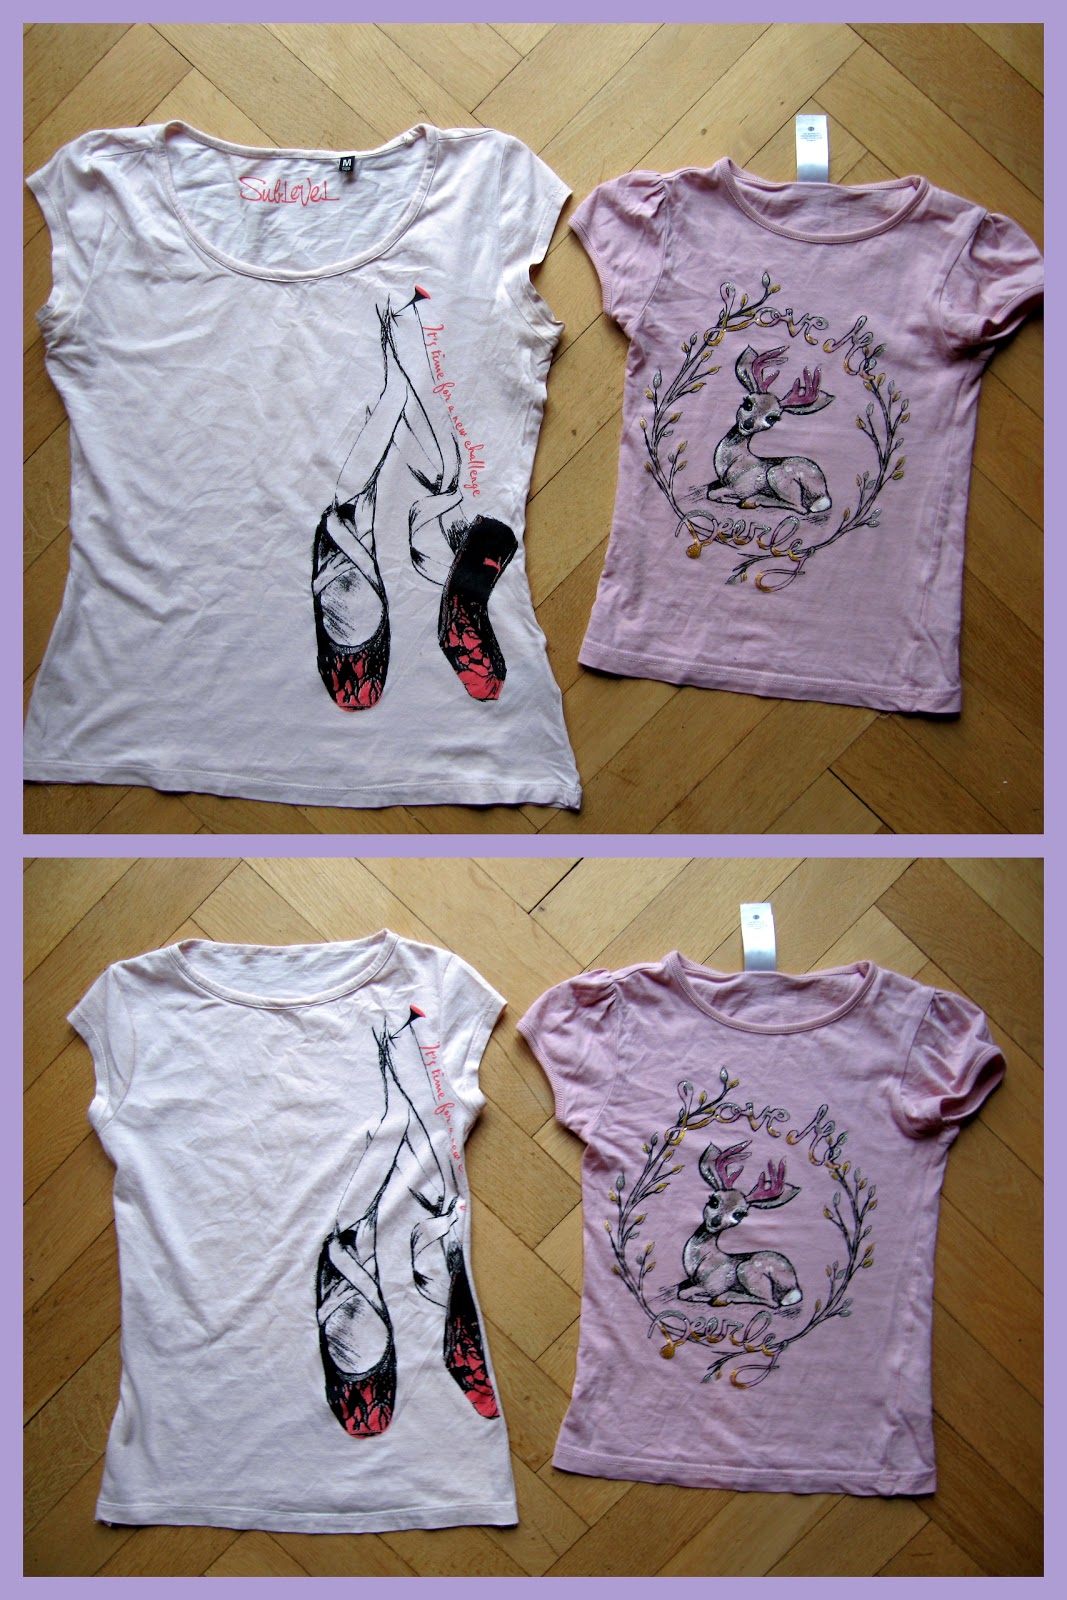
Yesterday, I took 45 minutes (I timed myself) to fix a tee shirt DD would never wear, although she loves white tees, the print is cute and it's a gift from a favorite aunt.

(Offending tee's on the left)

Why wouldn't she wear it? Well, the shape of the tee's settled firmly in the 80s of the last century. A tight neckband and a boxy cut. Although slouchy tees are making a comeback, they don't look like this, and on DD's very slim form it looks like she's wearing a sack. Not cute.

I did something like this before when I recut an old t-shirt of mine for DD. This time, though, I took a few pictures to document the process. Just in case someone other than all you pro sewers happens along ;-) !


Put a well fitting tee (here: one that still fits but only just) on top of the souvenir tee. Mark (or eyeball) the overlap on the sides and armhole. Don't cut off all the overlap; you need seam allowances for putting it back together!


Cut off the neck binding. Re-cut the sleeves (I left the sleeve hem intact).


If you're lucky like me you get enough scraps from the cut-offs that you can make a neck binding from it. Otherwise, I'd just turn under the neck.


I know there's a lot of miracle machines and techniques out there for knits. I just use a regular old sewing machine and whatever stitch takes my fancy. Since the fabric isn't very stretchy I didn't use a stretch stitch (which takes forever to sew) but a regular zigzag stitch, legth and width 2. I read you're supposed to use a longer length and smaller width but for me, that just leads to popped stitches.


A warning: this stitch won't look like RTW. Which I don't care about. Really, who goes looking at their neighbor's shirt hems?

(Except for you ;-) )

Sew the sleeves into the armholes. Sew the side seams and sleeve seams in one. Sew the bottom hem.

Violá: A souvenir t-shirt refashion!


Spring's arrived full force in Germany, and TGIF! Have a great weekend!

***********************************

Ich habe mich noch mal an die Umarbeitung (neudeutsch: Refashion) eines T-Shirts gemacht. Mit einem meiner T-Shirts hatte ich das schon einmal getan, dieses Mal habe ich aber ein paar mehr Fotos gemacht, für den Fall, dass sich auch mal ein nicht-Vollprofi auf diesen Blog verirrt ;-)

(Der Übeltäter links im Bild)

Es handelt sich um ein Souvenir-Shirt des Töchterleins. Wieso diese Art T-Shirt nicht mehr gern getragen wird muss ich wohl nicht erklären, oder? Ich kann aber berichten, dass meine Tochter die überarbeitete Version gestern gleich angezogen hat. Ein voller Erfolg!

So habe ich es gemacht, in einer 3/4 Stunde:


Ein einigermaßen passendes Shirt (hier: schon ein bisschen knapp) auf das Souvenir-Shirt legen.


Anzeichnen (oder merken), wie viel an den Seiten und Armausschnitten übersteht und abschneiden. Achtung: etwas Nahzugabe stehen lassen für's Zusammennähen!


Das Halsbündchen abschneiden. Wenn man Glück hat wie ich bleibt von den abgeschnittenen Seiten so viel übrig, dass man daraus eine neue Einfassung basteln kann. Ansonsten: Nahtzugabe nach innen wenden und Halsausschnitt einfach säumen.


Die Ärmel neu zuschneiden nach dem Muster-Shirt. Ich habe den Ärmelsaum gelassen und von oben neu geschnitten. Ärmel- und Seitennähte schließen. Unten säumen. Fertig!


Ich benutze ja keine Overlock, Coverlock oder was es noch gibt. Shirtstoff vernähe ich je nach Stretchigkeit mit einem Stretchstich (bei sehr dehnbaren Stoffen) oder Zickzackstich meiner regulären Maschine. Hier habe ich Zickzack mit 2er Länge und -Breite genommen. Mit längerem Zickzackstich habe ich kein Glück, die reißen mir immer. Ob das dann aussieht wie gekauft ist mir ehrlich gesagt piepegal; wer sich anderer Leute Säume so genau betrachtet hat ganz andere Probleme ;-) !


Und: fertig!


Ich wünsche Euch einen schönen Freitag und ein sonniges Wochenende!


Saturday, October 6, 2012

MM/IR: T-Shirt Refashion

You won't believe it, I finished one garment of the Make and Mend-Challenge! It's the "re-work one garment" part and I refashioned a ladies' tee (mine) into a girls' size tee.


Here's what I did:


  1. Laid the tee beside a well-fitting tee of the recipient (actually, one that's getting a bit small). 
  2. Decided which parts of the original to keep (hem, sleeve hems, front neck binding, most of the print).
  3. Laid the fitting tee on top of the old tee, to cut around.
  4. Cut off the sleeves (saving for later), cut the sides and armholes smaller approximating the fitting tee, cut off the shoulder seams, back neck binding and part of the front, to make a new neck opening that's as tight as the fitting tee.
  5. Folded the back neck allowance to the outside twice (so it would look like a binding, sort of), stitched.
  6. Stitched and topstitched the shoulder seams.
  7. Stitched the sleeves to the neck armholes, cutting off the leftover length at the underarms.
  8. Stitched the side seams and sleeves in one.


Done! I hope DD likes it (otherwise I may have to embellish it and check off another part of the challenge :-) )

Happy sewing!

****************

Wie angedroht habe ich mein T-Shirt umgearbeitet und eine kleine Version Größe 122/128 daraus gemacht (die Vorlage ist 116 und ein bisschen klein). So ging's:


  1. Habe ich beide Shirts nebeneinander gelegt.
  2. Entschieden, was bleiben soll und was weg kann. Ich habe die Säume gelassen, die vordere Ausschnitteinfassung auch, und es konnte ein Großteils des Drucks gerettet werden.
  3. Das kleine Shirt auf das große gelegt.
  4. Ausgeschnitten: erst die Ärmel ab und beiseite gelegt, dann die Seiten (incl. Armausschnitt) neu zugeschnitten und oben einmal quer drüber - die Schulternähte weg, die hintere Ausschnitteinfassung auch, und so tief geschnitten, dass ein neuer Ausschnitt entsteht, der etwa so groß ist wie die Vorlage.
  5. Den hinteren Ausschnitt habe ich nicht neu eingefasst, sondern zwei mal nach außen umgeschlagen und abgesteppt, das sieht fast aus wie eingefasst.
  6. Die Schulternähte geschlossen und abgesteppt.
  7. Die Ärmel in die neune Ärmellöcher genäht und das, was unten überstand/zu weit war, abgeschnitten.
  8. Ärmel- und Seitennähte in einem geschlossen.

Fertig! Jetzt muss es noch mit Töchterleins Wohlwollen finden (falls nicht, nähe ich ein paar Perlen drauf und hake den "Verzierungs-" Teil der Challenge auch ab!).

Näht schön!


LinkWithin

Blog Widget by LinkWithin